
15 min read
SPF, DKIM, and DMARC: The Complete Email Authentication Guide for Better Deliverability
By Toan Nhu · May 18, 2026
TL;DR
SPF, DKIM, and DMARC work together to help inbox providers trust your email.
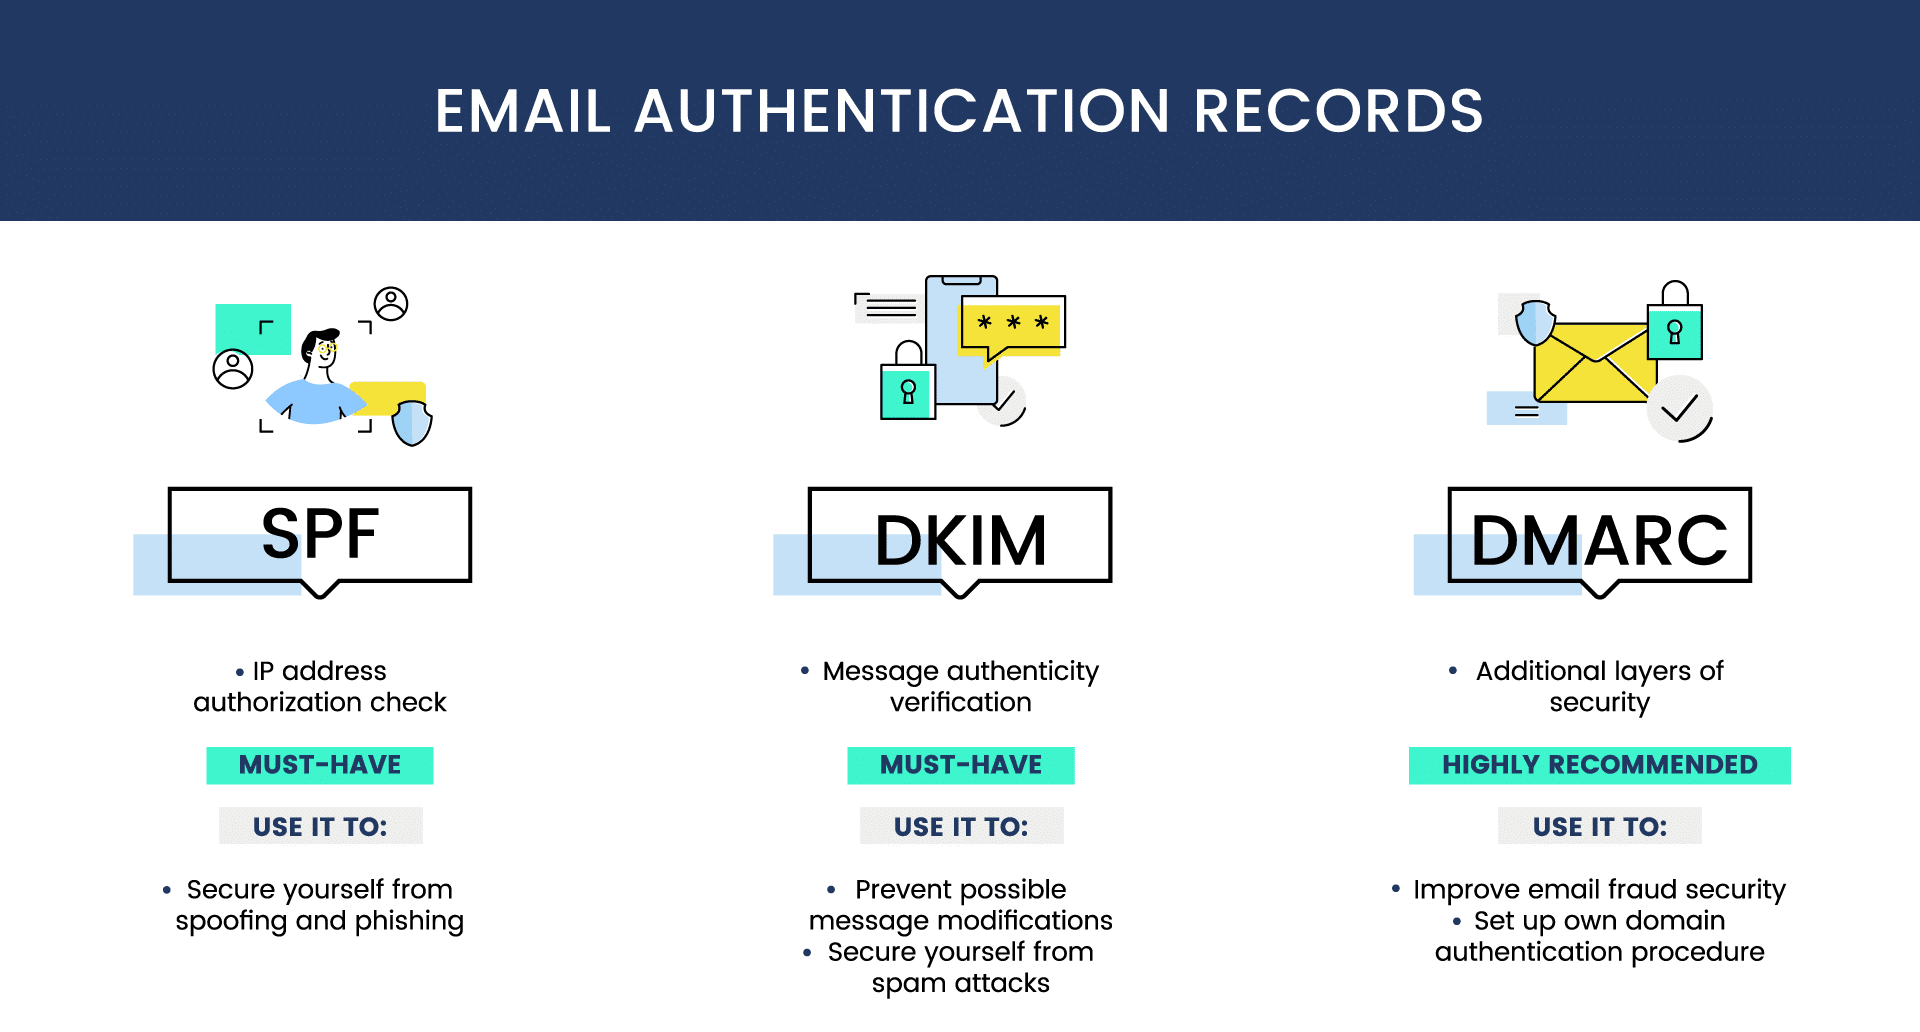
- SPF verifies that the sending server is allowed to send on behalf of your domain.
- DKIM verifies that the email was signed by your domain and was not altered in transit.
- DMARC checks alignment between the authenticated domain and the visible From domain, then applies your policy when authentication fails.
Start with SPF and DKIM, publish DMARC with p=none, monitor reports, fix legitimate senders that fail authentication, then gradually move to p=quarantine and eventually p=reject when you are confident everything is working.
Why Email Authentication Matters
Email providers are stricter than ever because phishing, spoofing, and low-quality bulk sending create a poor inbox experience. Authentication gives receiving servers a way to verify that your email is actually coming from you.
Without proper authentication, someone else can attempt to send email using your domain. Even when the message is not malicious, incomplete setup can make legitimate emails look suspicious to mailbox providers.
For lifecycle marketing and retention email, this can damage the full customer journey. A welcome email that lands in spam can reduce activation. A renewal reminder that gets rejected can hurt revenue. A behavior-triggered reactivation email that never reaches the inbox cannot bring users back.
Authentication is not the only factor in deliverability, but it is the foundation. Before optimizing subject lines, segmentation, send time, or automation logic, make sure your domain is trusted.
The 2026 Sender Reality
Major inbox providers now expect serious senders to authenticate email properly.
If you send bulk or high-volume email, you should treat SPF, DKIM, and DMARC as required infrastructure. Gmail, Yahoo, and Microsoft all place increasing emphasis on authenticated mail, low spam complaint rates, valid DNS records, proper formatting, and easy unsubscribe flows.
Even if your business does not send 5,000+ emails per day yet, setting up authentication early is still the right move. It helps protect your domain, builds reputation gradually, and reduces the risk of deliverability issues when your email volume increases.
SPF vs DKIM vs DMARC: Quick Comparison
Protocol | What It Checks | Where It Lives | Main Purpose |
SPF | Whether the sending IP/server is authorized | DNS TXT record | Prevent unauthorized servers from sending as your domain |
DKIM | Whether the message has a valid cryptographic signature | DNS TXT or CNAME record | Prove the message was signed and not modified |
DMARC | Whether SPF or DKIM passes and aligns with the From domain | DNS TXT record | Tell receivers what to do when authentication fails |
Think of them as three layers of trust:
- SPF checks the sending source.
- DKIM checks the message signature.
- DMARC checks domain alignment and policy.
You should not choose only one. For modern email deliverability, you want all three working together.
SPF: Sender Policy Framework
SPF stands for Sender Policy Framework. It lets you publish a DNS record that lists the servers and services allowed to send email for your domain.
When an inbox provider receives a message claiming to come from your domain, it checks whether the sending server is included in your SPF record. If the sending server is authorized, SPF passes. If not, SPF fails.
Example SPF Record
v=spf1 include:_spf.google.com include:sendgrid.net ~allThis example says:
v=spf1identifies the record as an SPF record.include:_spf.google.comauthorizes Google Workspace.include:sendgrid.netauthorizes SendGrid.~allmeans soft fail for anything not listed.
How DKIM Works
- Your sending service signs the email with a private key.
- The matching public key is published in your DNS.
- The receiving server reads the DKIM signature in the email header.
- The receiver checks the public key in DNS.
- If the signature is valid, DKIM passes.
Example DKIM Record
selector._domainkey.yourdomain.com TXT "v=DKIM1; k=rsa; p=MIGfMA0GCSqGSIb3DQEBA..."The exact DKIM record depends on your email provider. Many providers use CNAME records instead of a raw TXT public key.
DKIM Components
Component | Meaning |
selector | Identifies which DKIM key should be used |
_domainkey | Standard DKIM namespace |
v=DKIM1 | DKIM version |
k=rsa | Key type |
p= | Public key value |
DKIM Alignment
For DMARC to pass through DKIM, the domain in the DKIM signature should align with the visible From domain. In relaxed alignment, a subdomain can align with the root organizational domain. In strict alignment, the domains must match exactly.
For example:
- From domain:
yourdomain.com - DKIM signing domain:
mail.yourdomain.com - Relaxed alignment: usually acceptable
- Strict alignment: may fail because the domains are not identical
Most senders start with relaxed alignment unless they have a specific security reason to enforce strict alignment.
- Google Workspace or Microsoft 365
- Product notification systems
- Transactional email providers such as SendGrid, Postmark, Mailgun, or Amazon SES
- Marketing automation tools
- CRM platforms
- Help desk platforms
- Billing and invoice systems
- Newsletter tools
- Internal applications
- Behavior-based automation platforms such as Nudgen
This step is critical. If you forget a legitimate sender, that system may fail SPF, DKIM, or DMARC later.
Create a simple audit table:
Service | Email Type | Domain/Subdomain Used | SPF Needed | DKIM Needed | Owner |
Google Workspace | Employee email | yourdomain.com | Yes | Yes | IT |
Product app | Transactional | notifications.yourdomain.com | Yes | Yes | Engineering |
Nudgen | Lifecycle campaigns | mail.yourdomain.com | Depends on sending setup | Yes | Marketing/Growth |
Billing tool | Invoices | billing.yourdomain.com | Yes | Yes | Finance |
For Nudgen users, this audit is especially useful because behavior-based campaigns often touch different lifecycle stages: onboarding, activation, retention, upsell, and reactivation. Each campaign should send from a domain that is properly authenticated and aligned.
Step 2: Configure SPF
SPF is configured as a TXT record in DNS.
2.1 Build Your SPF Record
Start with the SPF version:
v=spf1Add each authorized sending provider:
v=spf1 include:_spf.google.com include:sendgrid.netEnd with a qualifier:
v=spf1 include:_spf.google.com include:sendgrid.net ~all2.2 Add SPF to DNS
In your DNS provider:
- Open DNS management for your domain.
- Add or edit a TXT record.
- Use
@for the root domain, or the subdomain name if you are authenticating a subdomain. - Paste the SPF value.
- Save the record.
- Wait for DNS propagation.
2.3 Avoid Multiple SPF Records
A domain should have only one SPF record. Multiple SPF TXT records on the same host can cause authentication failures.
Incorrect:
v=spf1 include:_spf.google.com ~all
v=spf1 include:sendgrid.net ~all
Correct:
v=spf1 include:_spf.google.com include:sendgrid.net ~all2.4 Watch the 10-Lookup Limit
SPF has a DNS lookup limit. Each include, a, mx, exists, and redirect can count toward that limit. If your SPF record becomes too complex, SPF can fail with a permanent error.
To reduce SPF lookup risk:
- Remove unused sending services.
- Separate senders by subdomain.
- Avoid stacking too many providers on the root domain.
- Consider SPF flattening only if you understand the maintenance tradeoff.
Step 3: Configure DKIM
DKIM setup is usually done inside each sending platform. Your provider will generate the DNS records you need.
Google Workspace DKIM
A typical Google Workspace DKIM setup looks like this:
- Open Google Admin Console.
- Go to Gmail authentication settings.
- Generate a DKIM record.
- Choose a selector, often
google. - Add the TXT record to DNS.
- Return to Google Admin and start authentication.
Microsoft 365 DKIM
A typical Microsoft 365 DKIM setup usually involves CNAME records:
- Open the Microsoft security or admin portal.
- Find DKIM settings for your domain.
- Copy the two CNAME records Microsoft provides.
- Add both records to DNS.
- Enable DKIM after DNS propagation.
Email Service Provider DKIM
For tools that send marketing, lifecycle, or transactional emails:
- Open the sending domain or authentication settings.
- Add the provided DKIM TXT or CNAME records to DNS.
- Verify the records inside the platform.
- Send a test email and inspect the headers.
For Nudgen campaigns, make sure the domain used in the visible From address is the same domain or aligned with the domain authenticated by your sending setup. This protects deliverability and keeps your brand identity consistent.
Step-by-Step SPF, DKIM, and DMARC Setup
The exact process depends on your domain registrar, DNS provider, and email sending services. The workflow below applies to most businesses.
Step 1: Audit Every Service That Sends Email
Start by listing every system that sends email from your domain or subdomain.
Common sending sources include:
Step 3: Configure DKIM
DKIM setup is usually done inside each sending platform. Your provider will generate the DNS records you need.
Google Workspace DKIM
A typical Google Workspace DKIM setup looks like this:
- Open Google Admin Console.
- Go to Gmail authentication settings.
- Generate a DKIM record.
- Choose a selector, often
google. - Add the TXT record to DNS.
- Return to Google Admin and start authentication.
Microsoft 365 DKIM
A typical Microsoft 365 DKIM setup usually involves CNAME records:
- Open the Microsoft security or admin portal.
- Find DKIM settings for your domain.
- Copy the two CNAME records Microsoft provides.
- Add both records to DNS.
- Enable DKIM after DNS propagation.
Email Service Provider DKIM
For tools that send marketing, lifecycle, or transactional emails:
- Open the sending domain or authentication settings.
- Add the provided DKIM TXT or CNAME records to DNS.
- Verify the records inside the platform.
- Send a test email and inspect the headers.
For Nudgen campaigns, make sure the domain used in the visible From address is the same domain or aligned with the domain authenticated by your sending setup. This protects deliverability and keeps your brand identity consistent.
Step 4: Configure DMARC
DMARC is also published as a DNS TXT record. The host is usually _dmarc.
4.1 Start With Monitoring
Use p=none first:
v=DMARC1; p=none; rua=mailto:dmarc@yourdomain.comThis lets you collect reports without changing delivery behavior.
4.2 Add DMARC to DNS
Create a TXT record:
Host: _dmarc
Type: TXT
Value: v=DMARC1; p=none; rua=mailto:dmarc@yourdomain.com
TTL: Default or 3600
4.3 Monitor Reports
DMARC aggregate reports are usually XML files. They can be difficult to read manually, so many teams use a DMARC reporting tool to parse them.
Monitor for:
- Unknown services sending from your domain
- Legitimate services failing SPF or DKIM
- Alignment failures
- Sudden spikes in failed messages
- Spoofing attempts
4.4 Fix Issues Before Enforcement
Before moving from p=none to enforcement, confirm that:
- Every legitimate sending service is included in your audit.
- SPF passes where expected.
- DKIM passes for every major sending stream.
- At least one of SPF or DKIM passes alignment.
- No important business emails are failing DMARC.
4.5 Move to Quarantine, Then Reject
Once monitoring is clean, move gradually.
Example quarantine rollout:
v=DMARC1; p=quarantine; pct=25; rua=mailto:dmarc@yourdomain.comThen increase over time:
v=DMARC1; p=quarantine; pct=50; rua=mailto:dmarc@yourdomain.comThen full quarantine:
v=DMARC1; p=quarantine; pct=100; rua=mailto:dmarc@yourdomain.comFinally, when everything is stable:
v=DMARC1; p=reject; rua=mailto:dmarc@yourdomain.comA safe rollout might look like this:
Phase | Policy | Percentage | Goal |
Phase 1 | p=none | 100% | Monitor and discover senders |
Phase 2 | p=quarantine | 25% | Start controlled enforcement |
Phase 3 | p=quarantine | 50% | Increase protection |
Phase 4 | p=quarantine | 100% | Quarantine all failing mail |
Phase 5 | p=reject | 100% | Block failing mail |
The right timeline depends on your volume, number of sending services, and risk tolerance. Smaller teams may move faster. Larger organizations with many systems should move carefully.
Step 5: Verify Your Setup
After adding DNS records, verify each protocol.
Use tools such as:
- MXToolbox
- Google Admin Toolbox
- Google Postmaster Tools
- Mail Tester
- DMARC report analyzers
- Your email platform's domain authentication checker
Check that:
- SPF record exists and has no syntax errors.
- There is only one SPF record per host.
- DKIM records are published correctly.
- DKIM signing is enabled in each provider.
- DMARC record exists at
_dmarc.yourdomain.com. - DMARC reports are being received.
- Test emails pass SPF, DKIM, and DMARC.
Common SPF Problems and Fixes
Problem: Multiple SPF Records
If a domain has more than one SPF record, receivers may treat SPF as invalid.
Fix: Merge all authorized senders into one SPF record.
Problem: Too Many DNS Lookups
If SPF exceeds the lookup limit, SPF can fail even if your syntax looks correct.
Fix: Remove unused includes, separate senders by subdomain, or simplify your sending architecture.
Problem: Missing Sending Service
A tool is sending email for your domain but is not listed in SPF.
Fix: Add the provider's SPF include or IP address to the correct SPF record.
Problem: Using -all Too Early
A hard fail can block legitimate mail if your sender audit is incomplete.
Fix: Use ~all during setup and only consider stricter enforcement after monitoring.
Common DKIM Problems and Fixes
Problem: DKIM Signature Missing
The email is not being signed by the sending service.
Fix: Enable DKIM in the provider dashboard and confirm the DNS records are correct.
Problem: Wrong Selector
The receiver looks for a DKIM key at the selector in the email header, but that selector does not exist in DNS.
Fix: Check the s= value in the DKIM header and confirm the matching DNS record exists.
Problem: DKIM Key Copy/Paste Error
A missing character, extra quote, or broken line can invalidate the public key.
Fix: Copy the record again from your provider and replace the DNS value carefully.
Problem: Message Modified After Signing
Some systems modify headers or body content after DKIM signing, which can break the signature.
Fix: Make sure content modifications happen before signing, or adjust the sending path so the final sender signs the message.
Common DMARC Problems and Fixes
Problem: DMARC Alignment Failure
SPF or DKIM may technically pass, but the authenticated domain does not align with the visible From domain.
Fix: Configure your sender so the SPF envelope domain or DKIM signing domain aligns with the From domain.
Problem: Reports Are Not Arriving
Your DMARC record has no valid rua address, or your reporting mailbox is not set up correctly.
Fix: Add a valid aggregate report address and make sure the mailbox can receive reports.
Problem: Legitimate Emails Blocked After p=reject
You moved to strict enforcement before all legitimate senders were authenticated.
Fix: Temporarily roll back to p=none or p=quarantine, identify failing legitimate senders, fix authentication, then enforce again gradually.
Authentication Strategy for Lifecycle Email
Cold outreach guides often focus on new sending domains, warmup, and high-volume prospecting. Lifecycle email has a different goal: deliver relevant messages to people who already interacted with your product, website, or business.
For Nudgen users, authentication should support the full customer journey.
Use Clear Sending Domains
Separate different email streams when possible:
Email Type | Example Domain/Subdomain |
Employee email | yourdomain.com |
Product notifications | notifications.yourdomain.com |
Marketing/lifecycle campaigns | mail.yourdomain.com |
Billing/invoices | billing.yourdomain.com |
Support | support.yourdomain.com |
This makes authentication easier to manage and protects reputation across different email types.
Keep Behavior-Based Emails Relevant
Authentication helps your emails get trusted, but engagement keeps your reputation healthy.
Use behavior-based triggers to avoid sending generic blasts. For example:
- Send onboarding help when a user signs up but does not complete setup.
- Send education content after a user interacts with a specific feature.
- Send reactivation messages only when a user becomes inactive.
- Stop or suppress emails when the user already completes the desired action.
This is where Nudgen fits naturally: smarter triggers reduce unnecessary sending and help campaigns match actual user behavior.
Respect Unsubscribe and Preferences
Authentication cannot compensate for unwanted email. Make unsubscribing easy, honor preferences quickly, and avoid sending to users who have clearly disengaged.
For marketing and subscribed messages, include:
- A visible unsubscribe link in the body
- List-Unsubscribe headers when applicable
- One-click unsubscribe support when required
- Preference management for different email categories
Avoid Sudden Volume Spikes
Even with perfect SPF, DKIM, and DMARC, sending volume matters. If your domain suddenly jumps from a few hundred emails to tens of thousands, mailbox providers may treat that as risky.
Scale gradually:
- Start with your most engaged users.
- Expand to less active segments slowly.
- Monitor bounce rate, complaint rate, open rate, and click behavior.
- Pause campaigns if negative signals increase.
Dedicated Domains vs Subdomains
There are two common approaches to sending campaign email: dedicated domains and subdomains.
Dedicated Sending Domains
Examples:
- getyourbrand.com
- tryyourbrand.com
- yourbrandmail.com
Dedicated domains can isolate reputation from your main domain, but they also require separate setup, monitoring, and reputation building. They can also look less familiar to customers if not branded carefully.
Sending Subdomains
Examples:
- mail.yourbrand.com
- updates.yourbrand.com
- notifications.yourbrand.com
Subdomains keep your brand consistent while still separating email streams. For lifecycle and retention campaigns, a well-configured subdomain is often a practical choice.
Each domain or subdomain used for sending should have its own authentication reviewed:
- SPF record
- DKIM record or CNAMEs
- DMARC policy
- Alignment with the visible From address
Monitoring and Maintenance
Authentication is not a one-time task. Your email stack changes over time, and every new tool can affect your domain reputation.
Weekly Checks
Review:
- DMARC report trends
- New unauthorized senders
- Authentication pass rates
- Bounce and complaint changes
- Recent campaign performance
Monthly Checks
Review:
- SPF record complexity
- Unused sending services
- DKIM status for each provider
- New domains or subdomains
- List quality and inactive segments
Re-Audit When Anything Changes
Run a full authentication audit when you:
- Add a new email provider
- Change DNS providers
- Change your primary email provider
- Launch a new product email stream
- Add a new automation platform
- Start sending from a new domain or subdomain
- See a sudden drop in inbox placement
- See a spike in bounces, spam complaints, or deferrals
A Practical Pre-Send Checklist
Before launching a new email automation or campaign, check the following:
- The sending domain or subdomain is intentional.
- SPF includes the provider that will send the email.
- DKIM is enabled and passing.
- DMARC exists for the domain.
- The From domain aligns with SPF or DKIM.
- The email includes a clear unsubscribe path when required.
- The list or segment is permission-based.
- The campaign is relevant to the recipient's behavior or lifecycle stage.
- Bounce and complaint monitoring is active.
- Volume is scaled gradually.
How Nudgen Fits Into Email Deliverability
Nudgen is built around behavior-based email automation and retention flows. That means deliverability should not be treated only as DNS setup. It should be connected to how, when, and why you send.
A strong Nudgen email workflow should combine:
- Proper SPF, DKIM, and DMARC setup
- Clean sending domains or subdomains
- Behavior-based segmentation
- Automatic suppression when the user already takes action
- Clear unsubscribe handling
- Consistent monitoring of engagement and negative signals
The goal is not just to send more emails. The goal is to send the right email at the right moment, with the technical foundation needed to reach the inbox.
Key Takeaways
SPF, DKIM, and DMARC are essential for modern email deliverability.
SPF authorizes your sending servers. DKIM signs your messages. DMARC enforces alignment and tells receiving servers what to do when checks fail.
Start with an audit of every service that sends email from your domain. Configure SPF and DKIM for each legitimate sender. Publish DMARC with p=none, monitor reports, fix issues, and only then move gradually toward enforcement.
For Nudgen users, authentication is the technical foundation for better lifecycle campaigns. Once your domain is trusted, behavior-based automation can do its job: sending relevant messages that help users activate, engage, return, and convert.
Frequently Asked Questions
Do I need SPF, DKIM, and DMARC?
Yes. SPF, DKIM, and DMARC solve different parts of the authentication problem. SPF validates the sending server, DKIM validates the message signature, and DMARC validates alignment and policy. For serious email sending, you should use all three.
Is SPF enough by itself?
No. SPF helps, but it does not fully protect your domain. SPF can also break in forwarding scenarios. DKIM and DMARC provide additional verification and policy control.
Is DKIM enough by itself?
No. DKIM proves that a message was signed and not modified, but DMARC is still needed to define what happens when authentication fails and to enforce domain alignment.
What DMARC policy should I start with?
Start with p=none. This lets you monitor authentication results without affecting delivery. After you confirm legitimate senders are passing, move gradually to p=quarantine and then p=reject.
How long does DNS propagation take?
DNS changes can appear within minutes, but full propagation can take longer depending on your DNS provider and TTL. If a new record does not show immediately, wait and check again later.
Can I use one SPF record for all subdomains?
No. SPF records are checked on the exact domain used in the return-path/envelope sender. If you send from a subdomain, configure SPF for that subdomain as needed.
Can one DMARC record protect subdomains?
A DMARC record on the organizational domain can apply to subdomains depending on your policy, but you may still want separate DMARC records for important subdomains if they have different sending patterns or risk profiles.
What is DMARC alignment?
DMARC alignment means the domain authenticated by SPF or DKIM matches, or is related to, the visible From domain. At least one of SPF or DKIM must pass and align for DMARC to pass.
What is the difference between relaxed and strict alignment?
Relaxed alignment allows a subdomain to align with the organizational domain. Strict alignment requires an exact domain match. Relaxed alignment is the default and is commonly used by many senders.
What happens if I skip DMARC?
Without DMARC, inbox providers do not have a clear policy from you about how to handle messages that fail authentication. You also lose visibility from DMARC aggregate reports, which makes it harder to detect spoofing or misconfigured senders.
Does authentication guarantee inbox placement?
No. Authentication is required for trust, but inbox placement also depends on reputation, recipient engagement, complaint rate, bounce rate, content quality, sending patterns, and list quality.
Why do behavior-based emails help deliverability?
Behavior-based emails are usually more relevant because they respond to what a user actually did or did not do. Relevant emails tend to receive better engagement and fewer complaints, which can support healthier sender reputation over time.
Recently Published
View all posts
Top 5 AI Email Generator Tools for 2026
Discover the top 5 AI email generator tools for 2026 — how they compare on automation features, integrations, pricing, and free tiers, and which one fits your workflow best.

Top 5 AI Email Assistant Tools for 2026
Inbox overload hurts productivity. Discover the 5 best AI email assistant tools for 2026 that can calm the chaos and boost your output.

The Complete Guide to Cold Email Outreach in 2026
Learn how to build high-performing cold email campaigns in 2026, from infrastructure and compliance to personalization, sequencing, and multi-channel outreach.
References
Ready to supercharge your outreach & retention?
Join 1,000+ top performers using Nudgen to automate lead generation, close more deals, and keep customers longer.
Get Started Free